User Help System
Trade Entry: Pre-Confirmation Window
Pre-confirmation allows for pre-clearing checks on trade information prior to the trade being submitted to CME ClearPort. Once enabled via the Preferences window, the Trade Entry form provides a Pre-Confirm button that validates the core data of a trade and displays a summarized view in a Pre-Confirm Deal window.
- To enable and use the Pre-Confirm feature:
- From the User Preferences window, select Deal Entry, and enable Show deal pre-confirm screen.
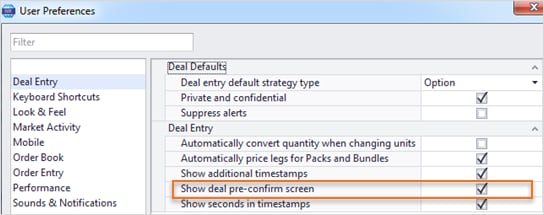
Note: When disabled, users can submit trades to CME ClearPort without pre-confirmation validation.
- Right-click an existing contract and select Add Deal.Launch the Trade Entry form from the OTC Trade Book or OTC Trading Grid.
Note: Use for example, the OTC Trade Book or OTC Trading Grid.
Fields auto-populate with applicable data.
- Complete the form and click the Pre-Confirm.
A Pre-Confirm Deal window appears and indicates if the deal was rejected or validated.
Note: If Rejected, a brief explanation for the rejection(s) displays in red on the Pre-Confirm Deal window and the Submit to Clearing button disables.
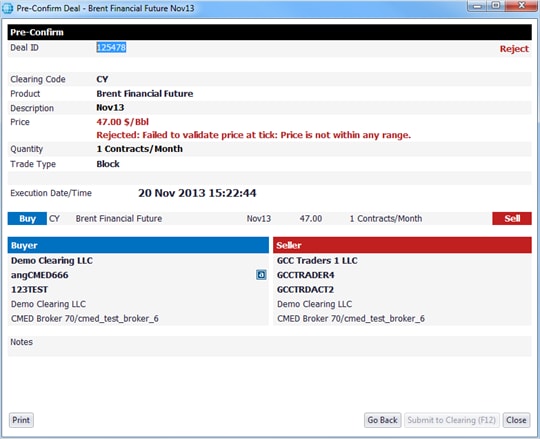
- Optional: Use the Go Back button to amend and re-submit a rejected trade via the Trade Entry form.
- Optional: To print the content on the Pre-Confirm Deal window, click the Print button.
- Once a deal has been validated, click Submit to Clearing.
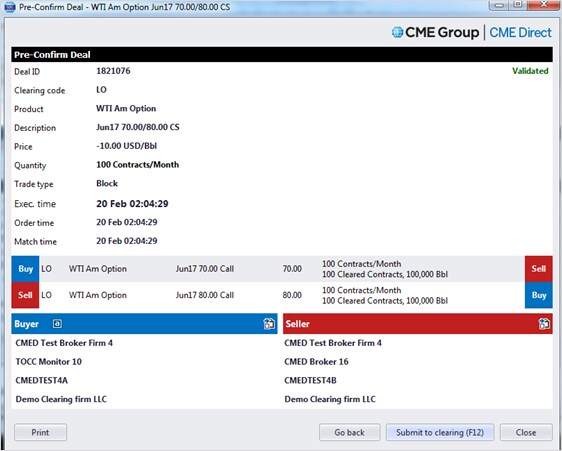
A pop-up notification appears showing the clearing status.
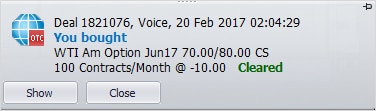
The cleared trade displays in the OTC Trade Book view.

Note: Double-clicking a cleared trade in the OTC Trade Book displays the Pre-Confirm Deal window.
- Use the Close button at any time to close the Pre-Confirm Deal window and discard any recent changes.
Non-Affirmed Trades
Non-affirmed trades cannot be pre-confirmed via the feature illustrated above. When booking non-affirmed trades, the following apply:
- When the ‘pre-confirm’ setting is set, the pre-confirm button displays in place of the ‘submit to clearing’ button.
- All trades get validated using the CPC validation service.
- The various failures from a trade display individually.
- Validation displays either on the pre-confirm screen (if the pre-confirm setting is set) or on the trade form.
- When displaying the Pre-Confirm page for a trade that has failed validation, the Submit to Clearing button is disabled. This is only when there is an error, rather than a warning.
- The Go Back button is always enabled and takes the user back to Trade Entry form
- The Close button in the pre-confirm form is always enabled and closes the form and discards recent changes. The trade form will not be re-displayed.
- If all the trade data is filled in, the user can still select ‘Pre-Confirm’ option to validate the trade. If all the checks were run successfully and no trade data is missing, the Submit to Clearing option will get enabled, which will send the trade to ClearPort.
Viewing Reject Messages
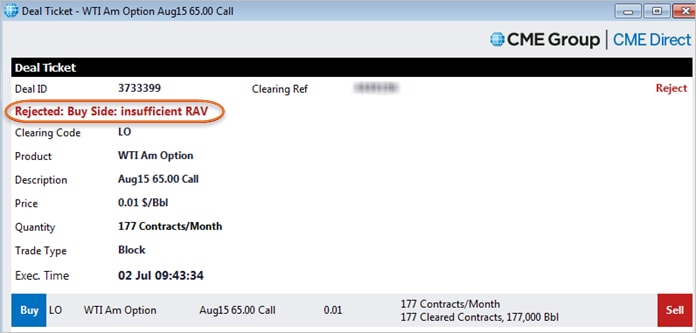
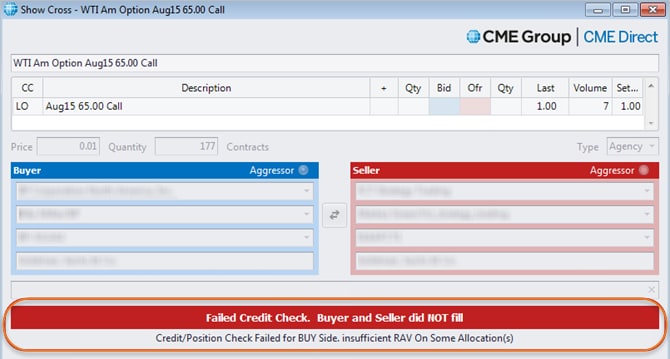
A clearing rejection message display in the Trade Entry form and Pre-Confirm window, and provides a description of why a trade was rejected. The display varies for OTC versus Cross trades.
Cross Trade
OTC Trade